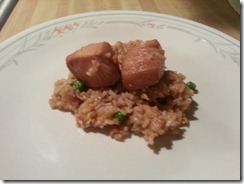
Fried rice. Easily the best food to eat. But what do you do? Go out and pick it up from a restaurant or trust those shady deliver services? I prefer to make it myself...much less angry rage and a whole lot of tasty rage. It's a simple process too, rage on.
Ingredients
- 2 Chicken Breasts
- 3 Cups Uncooked Rice
- 3 Eggs
- 3 Cloves of Garlic, minced
- 1 C Carrots, diced
- 1 C Peas, frozen
- 4 T Soy Sauce
- 1/2 T Ground Ginger
- 1 T Peanut Butter (smooth or crunchy)
- 1 T Garlic Chili Sauce
- 1/2 t Salt and Pepper
- Vegetable Oil
Marinade for Chicken
- 2 T Vegetable Oil
- 1 T Soy Sauce
- 1/2 t Granulated Garlic
- 1/2 t Ground Ginger
- 1 t Brown Sugar
- Pinch of Salt and Pepper
Quick Directions
- Cut chicken into 1/2 inch or 1 inch cubes, place in container with marinade and make sure all of the chicken is coated nicely. Cover and refrigerate for at least 30 minutes.
- Heat wok or frying pan to medium high and add chicken. Cook till chicken has reached an internal temperature of 165. 8-10 minutes roughly. Remove and set aside.
- Heat wok or frying pan to medium high or high and coat with oil. Enough to generously cover pan. Add rice once the pan is hot and stir constantly. If rice starts to stick or pan becomes dry, add some more oil.
- Once rice begins to brown slightly, make a hole in the center and add the eggs. Scramble them in a rage until nearly done, then mix in with the rice.
- Add carrots and cook for 3-5 mins, still stirring.
- Add garlic and let cook for about a minute or until it becomes fragrant. Add in peas and cook another 2-4 mins.
- Add in remaining ingredients. Let it cook for another minute, then taste and adjust seasonings as needed for personal preference.
- Add the chicken, cook for another 2-4 minutes.
- Enjoy!
Detailed Directions
Fried rice is best done with rice that has been cooked and left in the refrigerator
overnight. So it works great when dealing with a lot of left over rice from
another meal. If you didn't have rice left over from last night's dish and
didn't remember to make it ahead of time, I have found that using instant rice
works great in a pinch. Using regular rice that hasn't had a chance to cool
down doesn't seem to work as well to me.
Preparing the Chicken
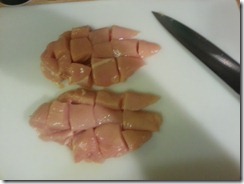
Start by marinating your chicken. I dice my chicken in 1 inch chunks, but 1/2 inch works great too. Go with your personal preference here, but try to keep the pieces close to the same size so that they are all finished cooking at the same time. Whisk together the marinade, toss the chicken in, and let it sit for at least 30 mins covered in your fridge.
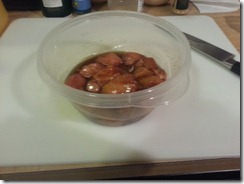
While that is doing its work, go ahead and get your carrots and garlic chopped up. Remember, you have to separate these things as they will go into the wok at different times.
By now, I would assume you have the rice that has been refrigerated overnight or else you went with the instant rice method. Both work well, but you will get a better product if you take the time to cook the rice and let it sit over night in the fridge. Right, onto the cooking!
Time to Cook!
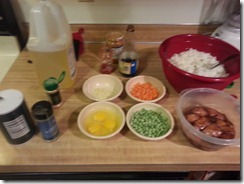
Fried rice needs constant attention so you want to make sure all of your ingredients are ready to go before you start. I always put all the ingredients into bowls next to my stove so that it’s a quick grab when the time comes for them to go in.
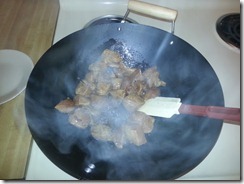
First take that chicken out and get ready to start the meal off right. Get your wok (or frying pan if you don’t have a wok) heated up. I prefer medium high heat, but if you’re using a wok, nothing wrong with going full on high as that is what a wok is designed for. Once that baby is cooking (well almost, but I meant hot in this instance) toss your chicken in. Don’t be afraid if a little bit or all of the marinade finds its way into the pan as that is your liquid for this cooking process.
Remember, you can’t cook something without some sort of liquid or fat(butter/oil/other alternatives) there to keep the product from sticking. Toss and turn the chicken till it reaches an internal temp of 165 and then pull it out and set aside till later.
Now add a liberal amount of oil, enough to coat the pan and a little extra won’t hurt a thing. Once its heated up (medium high heat or high if you have a wok) toss in your rice. Make sure to constantly stir the rice and if you notice it sticking, don’t be shy, add in more oil. The last thing you want is your fried rice to not fry. I cook the rice till it starts to brown, and you should too.
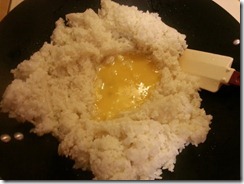
Once your rice is browning nicely, we can move on to the next step. First make a nice hole in the middle of the pan. Here I usually find it necessary to add a bit of oil as it is usually too dry in the middle, but this is a judgment call. Nice, you have your little well of lovely, add in the eggs (that you have beaten into a consistency you would use for scrambled eggs) and let them cook a bit, then stir a little. I prefer to just run my spatula through the well and pull the cooked eggs to the side so that the uncooked parts can fill in and get their turn. It’s pretty simple, just do this for a few till most of the eggs are cooked and then mix it all together. A little bit of uncooked egg at this point is great because it will coat the rice and make some more tasty product.
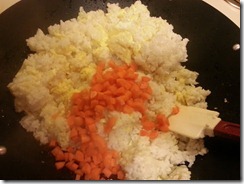
Now, we are ready to add in the carrots. Mix them in and let the whole mess cook for 3-6 mins. The whole time stirring, remember we don’t want it to stick. 3 minutes for more crunchy carrots (if you like that texture) or 6 for more tender.
Then add your garlic. Stir it in and let it do its thing, about a minute or until it becomes fragrant is enough. Finally, add your peas and give it another 2-4 mins.
It’s time for the reckoning. Seasoning! Start by adding in soy sauce, ground ginger, garlic chili sauce, peanut butter, and salt and pepper. Let it meld together for 1-2 mins. Now this is where we get real. Pull out your tasting spoon, dig in, and see what it tastes like. If you think it needs something, don’t be shy, add it. But remember, you can’t take away seasoning, so take slow steps when adding more so that you don’t add too much of something. This is all based on what your taste buds are telling you, nobody will taste things the same and they won’t ever like the same things in the same way. So cook for you and hope they like it I say, if they don’t rage on them!
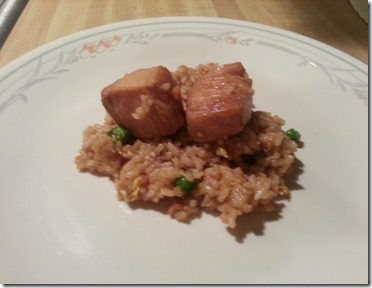
Now that we have the seasonings squared away, we can add in the chicken we set aside earlier. Toss it into the pot and let it get back up to temp. A few minutes should be plenty of time. And there you have it, fried rice.
 Substitutions and Variations
- There are a lot of ways to make fried rice, so don’t be afraid to experiment. You may find that you prefer more garlic or less ginger. It is not an exact science when you get in the kitchen and not everybody has the same taste buds either. You don’t have to marinate the chicken, instead you could just toss some salt and pepper on it and cook it that way. Or if you have some leftover chicken from another meal, just dice it up and toss it in.
- Some people prefer to use wok oil or sesame oil, and those are fine options. I usually don’t keep those in my kitchen but always have vegetable oil. You may also be allergic to peanuts and if so, leaving the peanut butter out won’t hurt a thing. If you have peanut oil, you can use that instead of the vegetable oil. But once again, I don’t usually have that in my kitchen that is why I use the peanut butter to add some of that peanut flavor.
- Meat is another area that can largely affect the kind of rice you make. you can marinate any meat in the marinade for similar results, or choose to leave meat out altogether. The same goes with the vegetables you put into it. I prefer to put in peas and carrots, but once again feel free to add others of your choice.
Rage on!


